DIY Lean-To Shed Build: Low-Cost, High-Quality Shed Construction Plans
Hey there, fellow DIY enthusiasts! So, you're dreaming of a lean-to shed â€" a practical addition to your property that won't break the bank or require a PhD in carpentry. Fantastic! You've come to the right place. This guide will walk you through building your own lean-to shed, focusing on cost-effectiveness and quality construction. Get ready to roll up your sleeves and build something awesome!
Planning Your Lean-To Shed
Before you even think about grabbing a hammer, let's get the planning sorted. This is crucial for a successful build, and it'll save you headaches (and potentially money) down the line.
Determining Size and Location
First things first: how big do you need your lean-to shed to be? Consider what you'll be storing inside. Will it house gardening tools, bicycles, or maybe just extra firewood? Measure the space you have available and sketch out a few options. Remember, a smaller shed is cheaper and quicker to build.
Next, choose the perfect location. Think about sunlight, proximity to power sources (if needed), and accessibility. Make sure you comply with any local building codes or regulations before you start digging!
Materials List: Keeping it Budget-Friendly
One of the best things about a lean-to shed is its simplicity, meaning fewer materials and therefore lower costs. Here’s a general list. The specific quantities will depend on your shed's dimensions.
- Pressure-treated lumber: This is vital for the longevity of your shed, especially the base and supports. Choose lumber appropriate for ground contact.
- Plywood or OSB sheeting: For the walls and roof. OSB (Oriented Strand Board) is generally cheaper.
- Roofing material: Asphalt shingles are a common and affordable choice. You could also explore metal roofing for extra durability.
- Concrete blocks or pier blocks: For the foundation â€" a simple and cost-effective solution.
- Nails, screws, and other fasteners: Don't forget these essentials!
- Weatherstripping and sealant: To help keep the elements out.
- Optional: Window(s) for added light and ventilation.
Tip: Check local lumber yards and recycling centers for deals on reclaimed wood. You might be surprised at the savings!
Tools You'll Need
Gather your tools before you start. Borrowing from friends or renting from a local hardware store can save you money if you don’t own everything.
- Measuring tape
- Level
- Shovel
- Hammer
- Drill/driver
- Circular saw or hand saw
- Post hole digger (optional, but helpful)
- Safety glasses and work gloves â€" always prioritize safety!
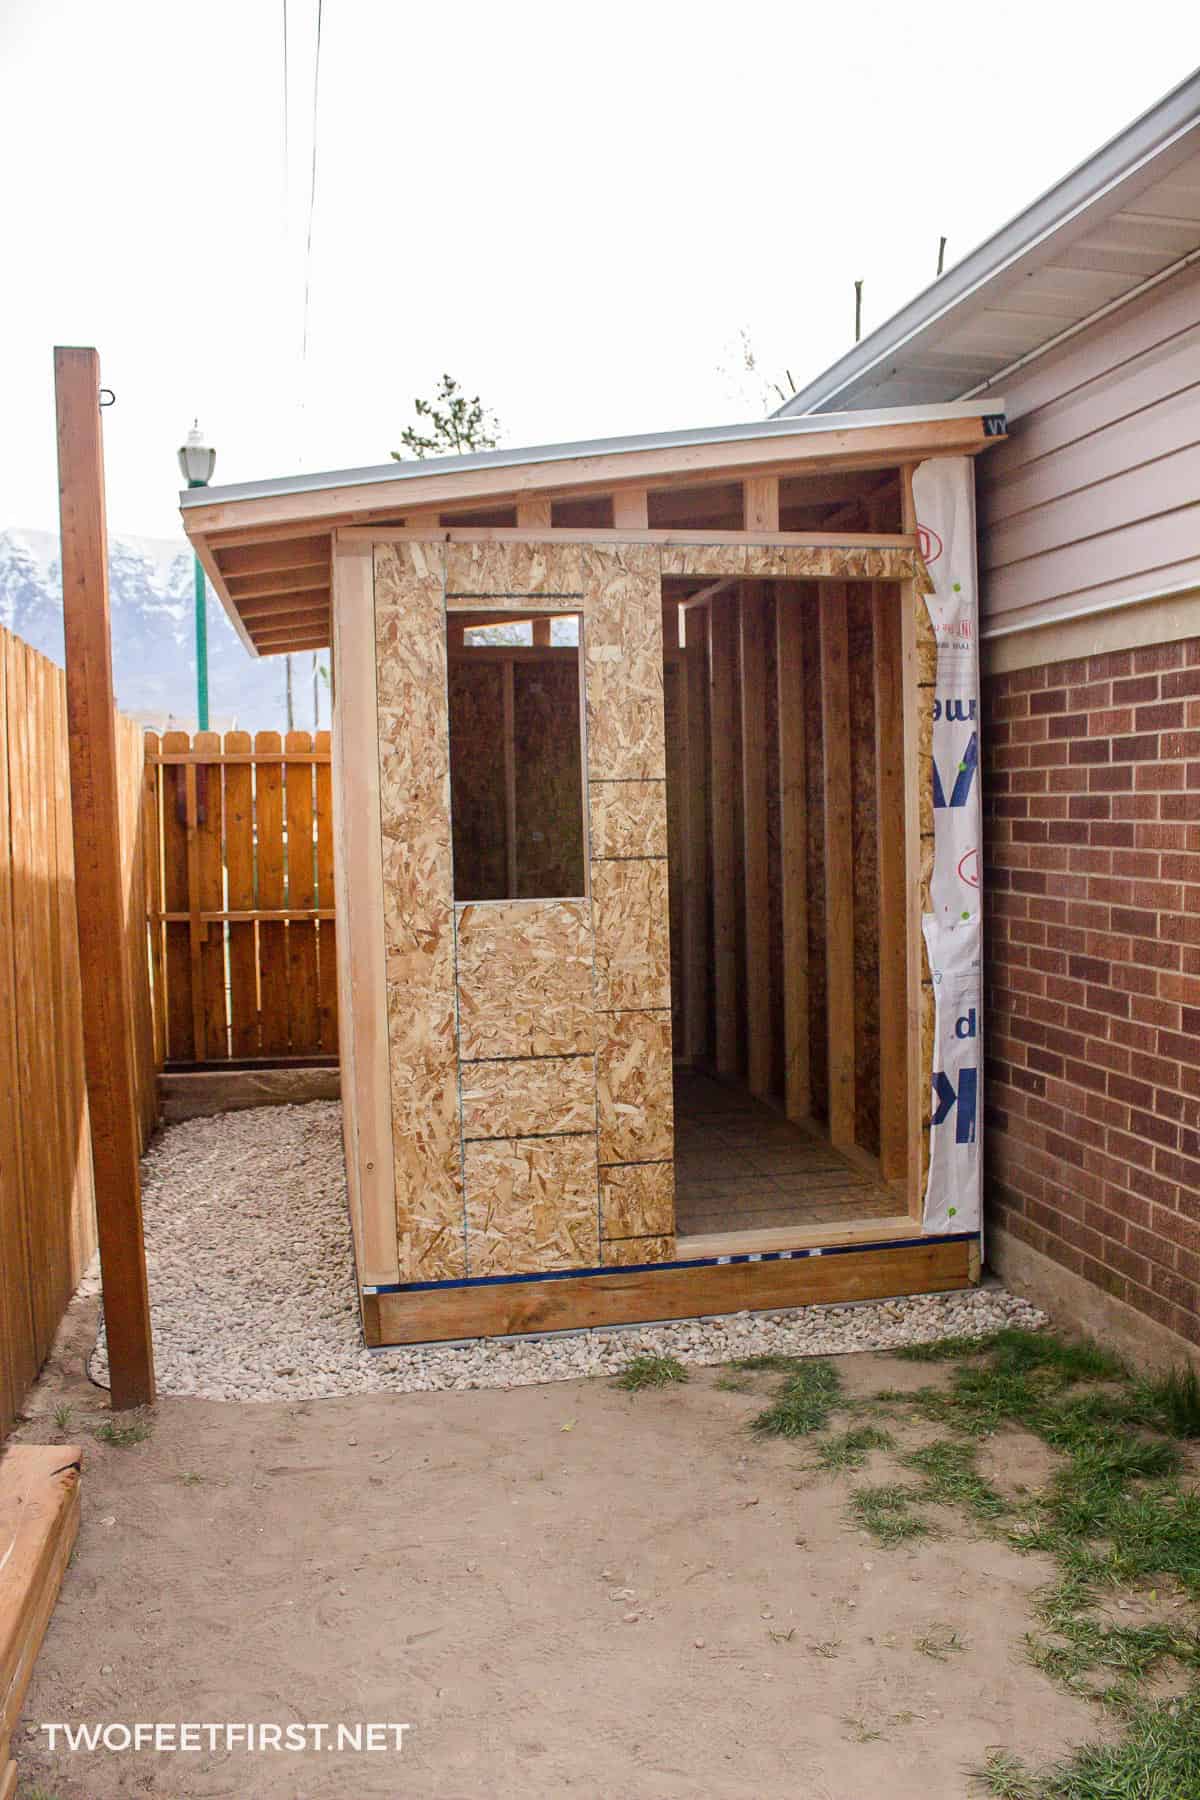
Building Your Lean-To Shed: A Step-by-Step Guide
Let's get our hands dirty! This is a general guide, and you might need to adjust based on your specific design.
Foundation
Start by leveling the ground where your shed will sit. Use a shovel to create a level base. If your soil is soft, you may want to add a layer of gravel for better drainage. Then, set your concrete blocks or pier blocks in place, ensuring they're level and spaced appropriately to support your frame.
Framing
Next, build the frame of your shed. This typically involves constructing a base frame resting on the foundation blocks, and then building vertical supports for the walls. Use pressure-treated lumber for the base and supports for maximum durability. Make sure all your cuts are precise and everything is square and level.
Wall Construction
Once the frame is up, you can attach your plywood or OSB sheeting to the walls. Use appropriate nails or screws and ensure the sheeting is securely fastened. Remember to leave openings for doors and windows if you’re including them.
Roofing
This is arguably the most important part. The roof needs to be strong enough to withstand the elements. Construct the roof framing, ensuring a sufficient slope for water runoff. Then, install your chosen roofing material according to the manufacturer’s instructions.
Finishing Touches
Once the roof is on, add any finishing touches like weather stripping around doors and windows, exterior paint or sealant for protection, and potentially a simple door. Congratulations â€" you’ve built your lean-to shed!
Tips for Success
- Take your time: Rushing the process can lead to mistakes.
- Check your measurements repeatedly: Accuracy is key for a stable structure.
- Use a level constantly: Ensure everything is perfectly level to avoid problems later.
- Ask for help if you need it: Don't be afraid to enlist a friend or family member for assistance.
- Prioritize safety: Wear safety glasses and gloves, and use appropriate caution with power tools.
Commonly Asked Questions
Here are some common questions people have when building a lean-to shed:
Q: Do I need a building permit?
A: This depends on your location and the size of your shed. Check with your local building department to confirm whether a permit is required.
Q: How long will it take to build?
A: The construction time depends on your experience and the size of the shed. You could build a small lean-to in a weekend, while a larger one might take several days.
Q: What kind of foundation is best?
A: For a simple lean-to, concrete blocks or pier blocks are often the most cost-effective and easy to install.
Q: Can I use recycled materials?
A: Absolutely! Using recycled materials like reclaimed wood can significantly reduce your costs. Just make sure they are structurally sound.
Q: What if I make a mistake?
A: Don't worry, everyone makes mistakes! Take your time, and if necessary, don’t hesitate to ask for help or advice from more experienced DIYers.
Happy building! I hope this guide helps you create your dream lean-to shed. Remember to share your progress and finished project â€" I’d love to see it!
0 comments:
Post a Comment
Note: Only a member of this blog may post a comment.