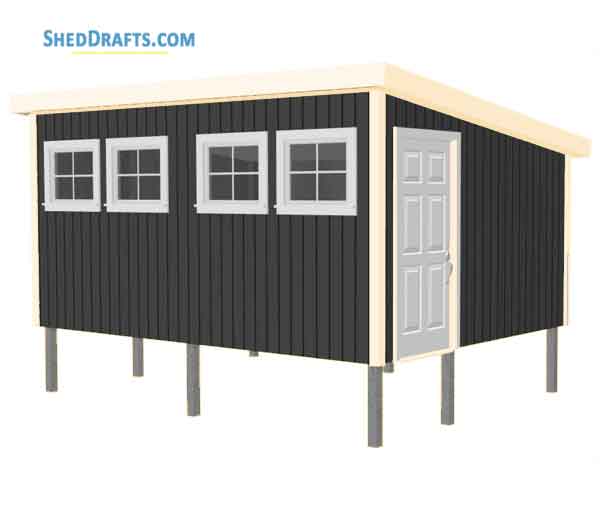
Step into Simplicity: Build Your Own Lean-To Shed for Less
Tired of cluttered garages and overflowing storage spaces? Yearning for a simple, affordable solution to your outdoor storage needs? Then consider building your own lean-to shed! This project offers a rewarding blend of practicality and affordability, allowing you to create valuable extra space without breaking the bank. Forget expensive pre-fabricated structures; with a little elbow grease and this guide, you’ll construct a functional and aesthetically pleasing lean-to shed that perfectly complements your property.
Planning Your Lean-To Shed: Laying the Foundation for Success
Before you even pick up a hammer, careful planning ensures a smooth and efficient build. First, determine the size and location of your shed. Consider the available space against an existing structure (house, garage, fence) and how much storage you need. Sketch a simple design, noting dimensions and materials. Next, secure the necessary permits from your local councilâ€"this step is crucial and varies by region. Don't skip it! Finally, acquire your building materials. Opt for pressure-treated lumber for durability and longevity, especially for the base and support posts. This initial planning phase sets the stage for a successful project.
Gathering Your Materials: A Comprehensive Checklist
Building a lean-to shed requires specific materials; having them ready before you begin ensures a streamlined process. This list provides a solid starting point, but adjust quantities based on your shed’s dimensions:
- Pressure-treated lumber for the base frame and support posts.
- Untreated lumber for the roof rafters and sheathing.
- Roofing material (metal, asphalt shingles, or polycarbonate panels).
- Concrete blocks or posts for the foundation (depending on your soil conditions).
- Exterior-grade screws and nails.
- Building felt or roofing underlayment.
- Measuring tape, level, saw, hammer, drill, and other basic tools.
Consider sourcing materials from local lumber yards or recycling centers to save costs. Remember to factor in extra material for cuts and potential errors.
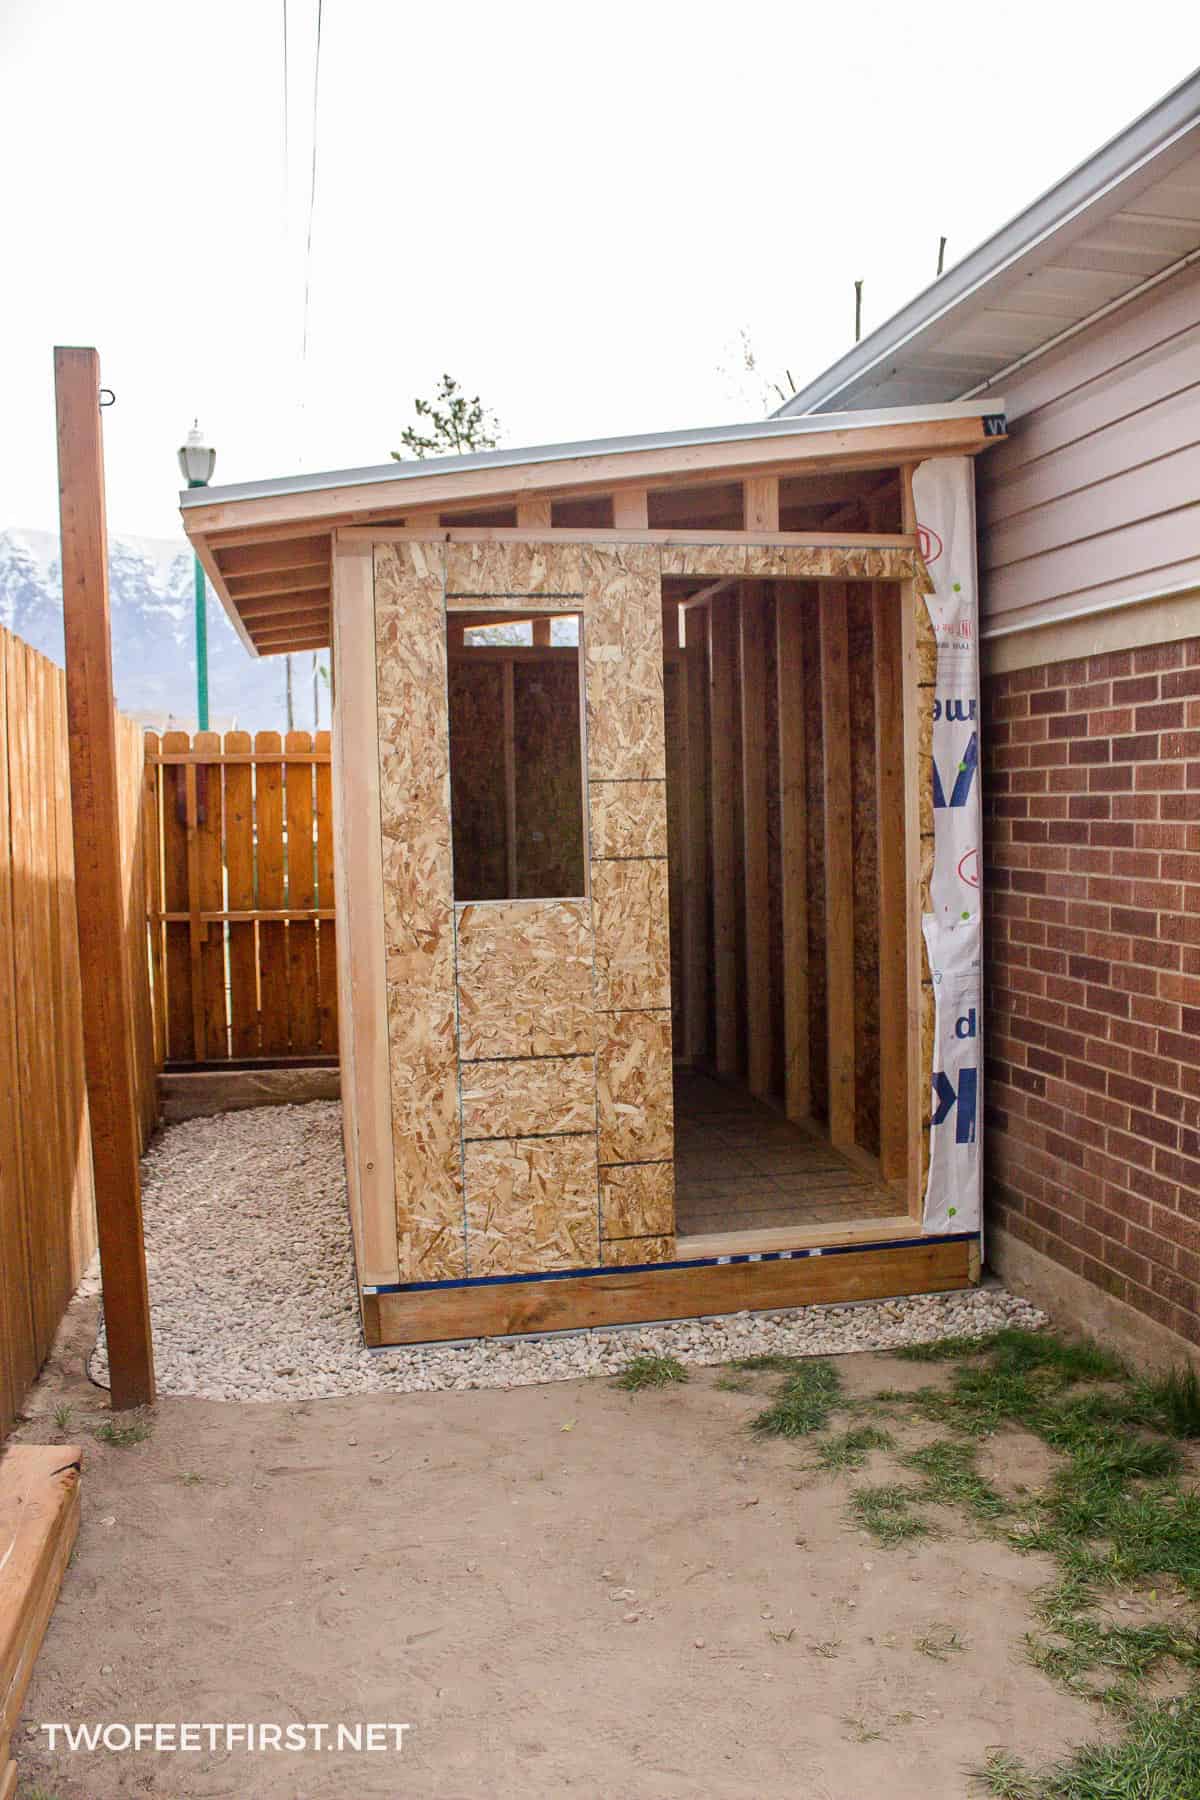
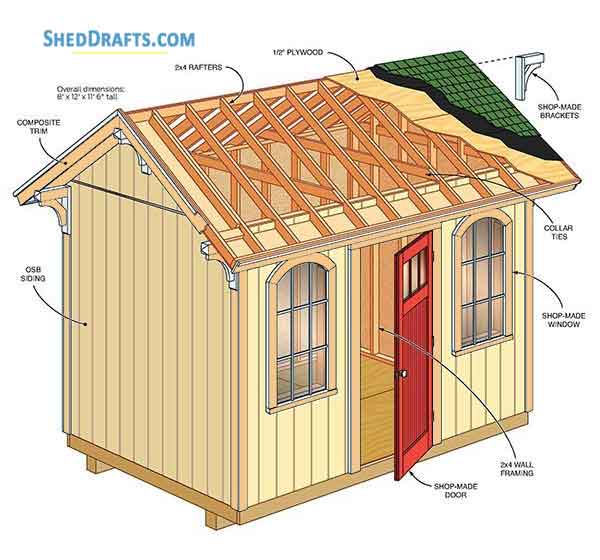
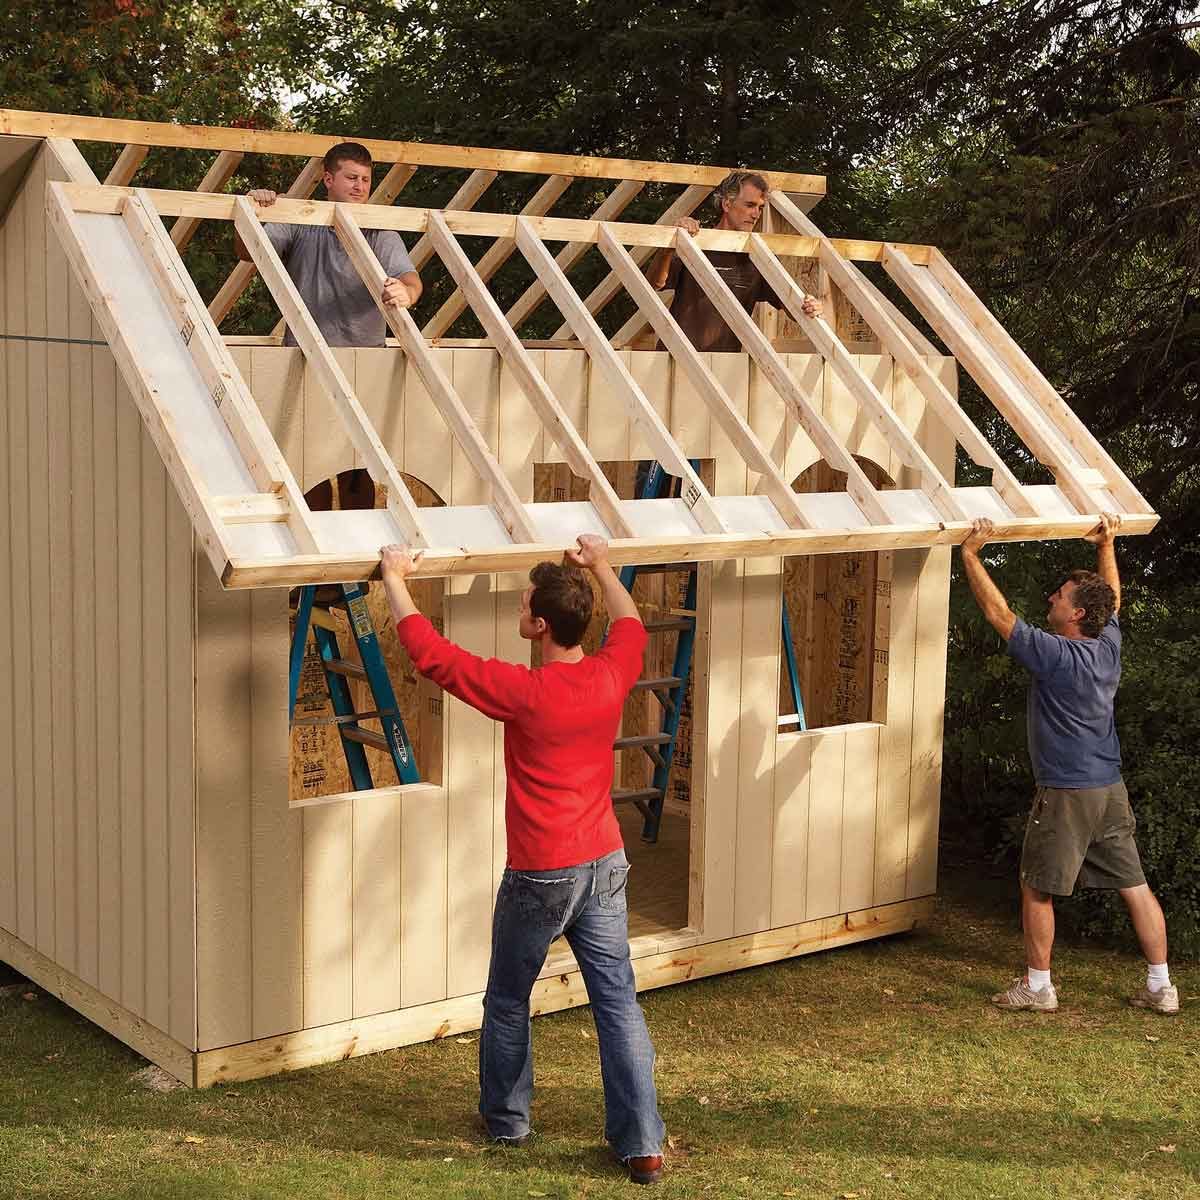
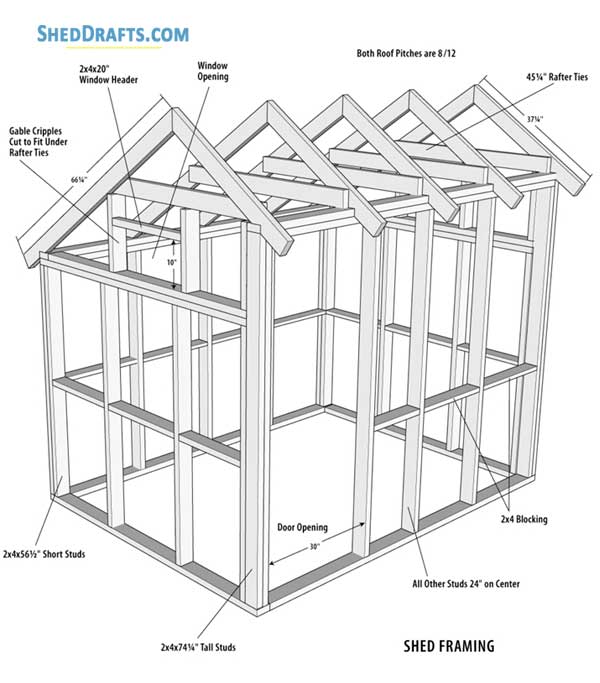
Construction: Building Your Lean-To Step-by-Step
Foundation and Framing:
Begin by constructing a level foundation using concrete blocks or setting pressure-treated posts in concrete. This provides a stable base for your shed. Next, erect the frame using pressure-treated lumber, ensuring it’s plumb and square. Use strong screws and bracing to create a robust structure. Remember to account for the angle of your lean-to roof; a slight incline ensures proper water runoff.
Roofing and Sheathing:
Attach the roof rafters to the frame, creating the desired slope. Then, add sheathing (plywood or OSB) to provide a solid base for the roofing material. Apply building felt or underlayment before installing your chosen roofing material. This will protect the shed from moisture. Secure the roofing carefully, following manufacturer instructions to ensure waterproofing and longevity.
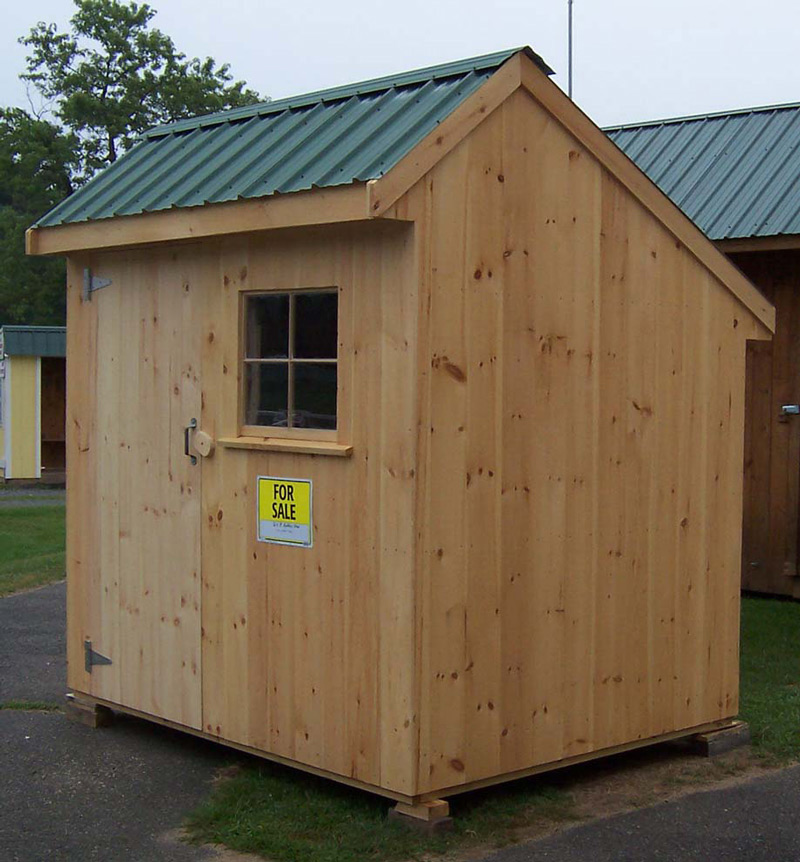
Finishing Touches:
Once the roof is complete, add any desired finishing touches. Consider adding a door for easy access and perhaps a small window for ventilation and natural light. A coat of exterior paint or sealant will protect the wood and enhance the shed's aesthetics. Remember safety throughout the building process â€" always wear appropriate safety gear.
Enjoy Your New Space!
With your new lean-to shed complete, enjoy the satisfaction of a job well done and the added storage space. You’ve not only saved money but also gained valuable skills. Remember to regularly maintain your shed to ensure its longevity. This simple project proves that creating functional, beautiful outdoor space can be both affordable and rewarding.